Monday, 10 June 2013

Running OTD HA with minimal root usage


Introduction

An as yet un-documented aspect of the Oracle Traffic Director 11.1.1.7 (OTD) new features, has introduced the ability to operate a highly available load balancing group within the Infiniband fabric but keeping to a minimum usage of the root account. In previous releases to enable the high availability features of the failover group it was necessary for a couple of the OTD running processes to be run with the root privileges, this was something that security conscious customers found disconcerting. 
This blog posting is courtesy of one of my colleagues, Mark Mundy who has been pulling together some instructions on how to setup OTD in an HA configuration and using minimal root user privileges. 

Why is root needed at all?

Before we can demonstrate how we can minimise the use of root in an HA OTD set up it is worth explaining a little of where OTD requires root permission. This will hopefully give the reader an appreciation of why it is used and even in a minimal use scenario how little ‘damage’ using it to execute part of the process stack can do.
Oracle Traffic Director provides support for failover between the instances in a failover group by using an implementation of the Virtual Routing Redundancy Protocol (VRRP), this being keepalived for Linux.
Keepalived v1.2.2 is included in the current Exalogic Guest Base Template and so you do not need to install or configure it. Oracle Traffic Director uses only the VRRP subsystem. If you wish to discover more about keepalived go to http://www.keepalived.org.  (If you are using Solaris then the implementation is done using the Solaris vrrpd service.)
VRRP specifies how routers can failover a VIP address from one node to another if the first node becomes unavailable for any reason. The IP failover is implemented by a router process running on each of the nodes. In a two-node failover group, the router process on the node to which the VIP is currently addressed is called the master. The master continuously advertises its presence to the router process on the second node. Only the root user can start or stop this keepalived process which controls the VIP and so without root permission having a highly available VIP would not be possible. With the 11.1.1.7 release of OTD it is possible to configure a highly available VIP utilising keepalived and root however all other processes associated with OTD such as the instance, the primordial and watchdog will be executed as a non root user. No user data is exposed to the keepalived process.

Example OTD configuration

There are a number of ways that Oracle Traffic Director can be deployed and utilised but for the purposes of this example the simplest and most common approach has been adopted. This design utilises the Exalogic Storage Array for all of the OTD collateral utilising a number of shares within the same project. The design consists of three identical vServers created all with the same vServer type and networking capability. The diagram below should give an idea of the layout of both the vServers and what they are hosting as well as how they are utilising various shares on the storage array. Notice that the Admin Server and Admin Node 1 are using OTD binaries from one share while the Admin Node 2 uses a different one. This will ensure if there is a need to patch OTD it can be done with a degree of availability while this is happening. There is one share for the entire OTD configuration in this example.


The 2 vServers hosting admin nodes work as local proxies for the OTD administration server and it is on these nodes that the highly available instances will perform the actions as designed within the loadbalancing configuration. In previous releases of OTD with this setup it was possible to avoid using root to run the administration server but the admin nodes that run an HA loadbalanced instance required root for a large part, if not all, of their administration and execution. In the latest release this has changed and it is this that is exploited in this example.

Configuring the Admin Server node

The first vServer that needs to be configured is the one hosting the administration server. There is no need to use the root account on this vServer after the specific shares that are needed by OTD have been permanently mounted. This note will not go into the details of how this is achieved as it is assumed the reader is familiar with this. The first share that is required to be temporarily mounted is the /export/common/general share available on the Exalogic storage array. This needs to be mounted and the OTD 11.1.1.7 installer placed in a directory within it (available from Oracle edelivery) and unzipped. An example being /mnt/common/general/OTD11117/Disk1. This can then be un-mounted when OTD has been installed. There is also a need to permanently mount two shares one for the binaries and another for the configurations.


/export/OTDExample/Primary_Install -> /u01/OTD
/export/OTDExample/OTDInstances -> /u01/OTDConfiguration
In this example the user chosen to install and run the Admin Server is the pre-configured oracle user and so ensure that the share mount points are owned by the oracle user on the ZFS appliance.  (See my earlier blog posting about creating shares on the ZFS appliance.)

There is now no additional need to utilise the root account on this vServer. Everything in this section should now be performed as the oracle user or an equivalent non privileged user of your choice.
For simplicity the OTD installer will be installed using a silent installer approach below is an example of how this can be achieved.


$ oracle@OTDAdminServer ~]$ /mnt/common/general/OTD11117/Disk1/runInstaller -silent -waitforcompletion -invPtrLoc /home/oracle/oraInst.loc ORACLE_HOME=/u01/OTD/ SKIP_SOFTWARE_UPDATES=TRUE
  The ORACLE_HOME location is where the OTD binaries will be laid down and this will populate the primary binary location on the share. The invPtrLoc will need to point to a previously created file called oraInst.loc which should contain the location of the Oracle Inventory. In this example this file contains the following:


$ cd /home/oracle
$ cat oraInst.log
inventory_log=/home/oracle/oraInventory
$
 For more information on silently installing Oracle Traffic Director refer to the documentation
Once the installation is complete the OTD admin server can be created and started. To create the admin server the following command can be used:


$ oracle@OTDAdminServer ~]$ /u01/OTD/bin/tadm configure-server --user=admin --java-home=/u01/OTD/jdk/ --instance-home=/u01/OTDInstances/
 When this is executed you will be prompted to provide an OTD admin user password of your choice and then the admin server will be created with its home directory under the /u01/OTDInstances share called admin-server
The admin server can now be started with the following command


$ oracle@OTDAdminServer ~]$ /u01/OTDInstances/admin-server/bin/startserv
 When the admin server has started it will be possible as the output will note, to access the admin console from a browser.
Log in and create a new test configuration of your choosing and provide a fake origin server so as to complete the configuration. This is only to demonstrate and the configuration can be later deleted to be replaced with a production one created. Do not deploy the configuration at this stage. Leave the admin console open and for the test configuration enable the plain text report in the virtual server monitoring section. This is done so as to later give us an idea that everything is working as expected in terms of the HA element of OTD.


This completes the work to get the admin server operational and as you can see in terms of OTD no use of the root privilege to configure, start or stop.
Configuring the Admin nodes
The admin nodes now need to be created and started and this is where with earlier releases of OTD there was a heavier requirement for the root account. The new release needs far less and this is demonstrated here by the fact that in order to minimise root use it is now possible to create and start and stop admin nodes without root. In this section we will do this.

Setup the first Instance node

After logging on to the first of the admin nodes (OTDNode1) as root there is an initial requirement to set up permanent shares to both the primary OTD install location and the configuration as there was with the admin server.  These shares are the same as were mounted for the Administration Server.  The mounting of these shares are the only time you require root access for this section.
Using a non privileged account such as the pre-configured oracle account you can now create an admin node and register it with the admin server previously created and started. Prior to running the command ensure the following.
  1. Create a sub-directory under /u01/OTDInstances with the hostname of this vServer
  2. Ensure that the admin server hostname is resolvable on the private IPoIB vNet in the /etc/hosts file
  3. Ensure that the admin node host name is resolvable in the admin server /etc/hosts file on the IPoIB private vNet created
The following example command will show the creation of the admin node.


$ /u01/OTD/bin/tadm configure-server --user=admin --java-home=/u01/OTD/jdk/ --instance-home=/u01/OTDInstances/OTDNode1 --server-user=oracle --admin-node --host=OTDAdminServer
The share primary binary location is used to launch the command and you will notice that the admin node server-user is the non privileged oracle user. After providing the admin password and accepting the self signed certificate the admin node should be created.
It is now possible to start the admin node using the startserv script located in the OTDNode1 bin directory. Note previously in order to utilise an HA OTD configuration this would need to be executed as root or as a user in the sudoers list.

Setup the Second Instance Node

Now that the first admin node is running it is possible to do the same with the second admin node.
Before the admin node can be created and started it needs to install OTD into the secondary binary location using a variation of the silent install for the admin server. This will mean mounting temporarily the /export/common/general share and then using the same kit to install OTD to the Secondary_Install share.
The second admin node should have the following shares mounted permanently


/export/OTDExample/Secondary_Install -> /u01/OTD
/export/OTDExample/OTDInstances -> /u01/OTDConfiguration
  
Thus the second instance will run binaries from a separate install from the other instances but the running configuration is located under the same share.

Prior to running the create command ensure the three pre-requisites as above are complete then you can run as an example


$ /u01/OTD/bin/tadm configure-server --user=admin --java-home=/u01/OTD/jdk/ --instance-home=/u01/OTDInstances/OTDNode2 --server-user=oracle --admin-node --host=OTDAdminServ
 
 One created the second admin node can be started using the startserv script under the OTDNode2 instance directory.  

Deploying a basic configuration

The next step is to utilise the admin console or indeed the command line to deploy the current basic configuration and create instances of it on the 2 admin nodes already running. This will not mean we have a highly available loadbalancing pattern but will at this stage mean we have 2 instances hosting the loadbalancing configuration that can be independently accessed on the public EoIB ip addresses assigned to each of the vServers when they were created. We will use the admin console to firstly ensure the 2 admin nodes are available and running and then to deploy the configuration to them both.

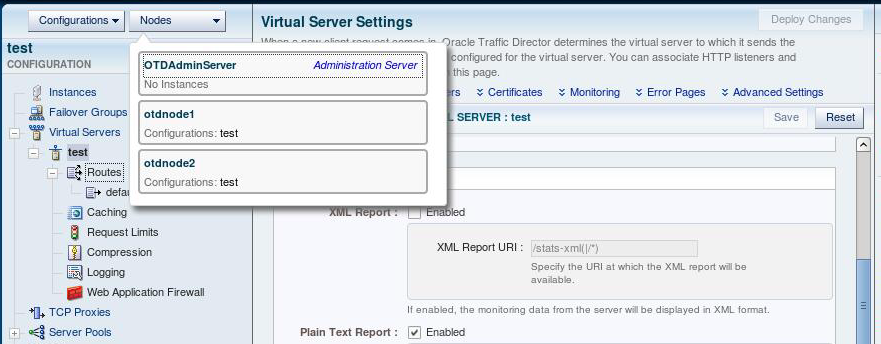
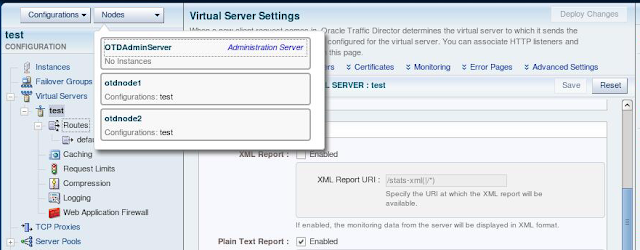
Here we can see we have 2 operational admin nodes with no instances deployed to them.
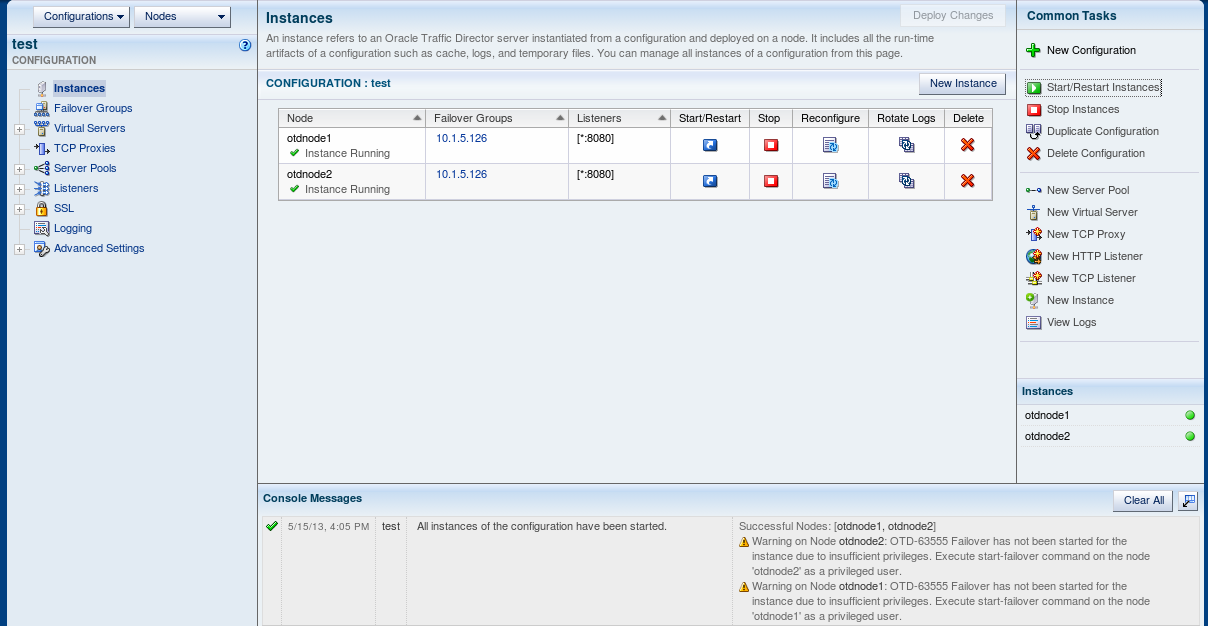
By hitting the deploy button to the top right and selecting the 2 otd admin nodes and NOT the admin server we can deploy the configuration and have 2 instances created one on each node.
The instances can now be started from the admin console. To verify the 2 instances are working it is possible in separate browser tabs to access the instance on the public EoIB ip address assigned to it and get performance metrics from it.  An example url is shown below and by using the IP address for each of the instances then metrics from both instances will be displayed.

http://<OTDNode1-EoIB-IP> :8080/.perf
At this stage it is also possible to verify that the entire OTD process tree for an admin node is all executing as the non privileged user as this example shows:


oracle 19808 0.0 0.0 25648 812 ? Ss May14 0:00 trafficd-wdog -d /u01/OTDInstances/OTDNode1/admin-server/confi
oracle 19809 0.0 0.3 149568 15156 ? S May14 0:17 \_ trafficd -d /u01/OTDInstances/OTDNode1/admin-server/config
oracle 19810 0.1 3.5 769996 141768 ? Sl May14 1:23 \_ trafficd -d /u01/OTDInstances/OTDNode1/admin-server/co
oracle 19897 0.0 0.0 11560 968 ? Ss May14 0:00 \_ /u01/OTD/lib/Cgistub -f /tmp/admin-server-4baa05d0
oracle 12508 0.0 0.0 11560 340 ? S 02:13 0:00 \_ /u01/OTD/lib/Cgistub -f /tmp/admin-server-4baa
oracle 12609 0.0 0.0 25648 812 ? Ss 02:16 0:00 trafficd-wdog -d /u01/OTDInstances/OTDNode1/net-test/config -r
oracle 12610 0.3 0.3 135016 12232 ? S 02:16 0:00 \_ trafficd -d /u01/OTDInstances/OTDNode1/net-test/config -r
oracle 12611 0.0 0.5 259904 23304 ? Sl 02:16 0:00 \_ trafficd -d /u01/OTDInstances/OTDNode1/net-test/config

Creating a failover group

Now we need to create a failover group to enable the configuration deployed to be made highly available. It is at this point that there is still a requirement to use the root privilege. The first stage in enabling an HA loadbalancing configuration is to create a failover group. This does not require root permission to create, however it will need root permission to activate. Creating a failover group can be done either via the command line or the admin console. For this example we will use the command line. From any of the three vServers log in as the oracle user and issue the following example command to create a new failover group within the configuration already created and active.

[oracle@OTDAdminServer ~]$/u01/OTD/bin/tadm create-failover-group --config=test --virtual-ip=<ip_on_public_EoIB --primary-node otdnode1 --backup-node=otdnode2 --router-id=230 --verbose --port=8989 --user=admin --host=OTDAdminServer --network-prefix-length=21
Enter admin-user-password>
OTD-63008 The operation was successful on nodes [otdnode1, otdnode2].
Warning on node 'otdnode2':
OTD-67334 Could not start failover due to insufficient privileges. Execute the start-failover command on node 'otdnode2' as a privileged user.
Warning on node 'otdnode1':
OTD-67334 Could not start failover due to insufficient privileges. Execute the start-failover command on node 'otdnode1' as a privileged user.
  
The failover group is created however you will see that 2 warnings are given. This is because although the non privileged user can create a failover group, it does not have permission to start the keepalived process. In our scenario the 2 instances are already running and so this warning is generated. This is the first of the changes in 11.1.1.7 to be encountered. The new command start-failover allows only what is required to be started as root to be performed separately. In order to complete the ability to run OTD in an HA configuration the command needs to be run as root or as a non privileged user who is part of the sudoers list locally on each of the admin nodes. This warning would not be seen if the instances were not already running but if an attempt was made to start an instance as a non privileged user in a failover group a warning would be issued about the need to start the failover group separately.
In order to minimise the use of root the preferred way to issue the start-failover command is via the non privileged user after adding it to the sudoers list. The specific permission required to allow this is as follows for the non privileged user and in this case we use the oracle user.

# cat /etc/sudoers | grep oracle
oracle ALL=(root) /u01/OTD/bin/tadm
 To set this up as root on each of the 2 admin nodes execute visudo and add the line to give the oracle user the privilege to run the tadm command.

Once this has been set up the start-failover command can be issued locally on each of the admin node vServers as this example shows.


$ sudo /u01/OTD/bin/tadm start-failover --instance-home=/u01/OTDInstances/OTDNode1 --config=test
[sudo] password for oracle:
OTD-70198 Failover has been started successfully

It is now possible from a browser to access the text based performance statistics as before but on the public vip assigned to the HA OTD configuration. A quick look at the process tree for an OTD admin node will now show what this new command has done.

oracle 19808 0.0 0.0 25648 812 ? Ss May14 0:00 trafficd-wdog -d /u01/OTDInstances/OTDNode1/admin-server/config -r /u01/OTD -t /tmp/admin-server-4baa05d0 -u orac
oracle 19809 0.0 0.3 149568 15156 ? S May14 0:17 \_ trafficd -d /u01/OTDInstances/OTDNode1/admin-server/config -r /u01/OTD -t /tmp/admin-server-4baa05d0 -u oracl
oracle 19810 0.1 3.5 770244 142548 ? Sl May14 1:26 \_ trafficd -d /u01/OTDInstances/OTDNode1/admin-server/config -r /u01/OTD -t /tmp/admin-server-4baa05d0 -u o
oracle 19897 0.0 0.0 11560 968 ? Ss May14 0:00 \_ /u01/OTD/lib/Cgistub -f /tmp/admin-server-4baa05d0/.cgistub_19810
oracle 12508 0.0 0.0 11560 340 ? S 02:13 0:00 \_ /u01/OTD/lib/Cgistub -f /tmp/admin-server-4baa05d0/.cgistub_19810
oracle 12857 0.0 0.0 25648 808 ? Ss 02:25 0:00 trafficd-wdog -d /u01/OTDInstances/OTDNode1/net-test/config -r /u01/OTD -t /tmp/net-test-b92c33b1 -u oracle
oracle 12858 0.0 0.3 135016 12236 ? S 02:25 0:00 \_ trafficd -d /u01/OTDInstances/OTDNode1/net-test/config -r /u01/OTD -t /tmp/net-test-b92c33b1 -u oracle
oracle 12859 0.0 0.5 259908 23308 ? Sl 02:25 0:00 \_ trafficd -d /u01/OTDInstances/OTDNode1/net-test/config -r /u01/OTD -t /tmp/net-test-b92c33b1 -u oracle
root 12986 0.0 0.0 35852 504 ? Ss 02:29 0:00 /usr/sbin/keepalived --vrrp --use-file /u01/OTDInstances/OTDNode1/net-test/config/keepalived.conf --pid /tmp/net-
root 12987 0.0 0.0 37944 1012 ? S 02:29 0:00 \_ /usr/sbin/keepalived --vrrp --use-file /u01/OTDInstances/OTDNode1/net-test/config/keepalived.conf --pid /tmp/root 12987 0.0 0.0 37944 1012 ? S 02:29 0:00 \_ /usr/sbin/keepalived --vrrp --use-file /u01/OTDInstances/O
As you can see, now only the keepalived processes are running as root with everything else run as oracle. In previous releases a lot more of the process tree would have been run as root in order to achieve the same thing.

Starting and stopping the instances hosting the failover group

There are some important points to note around how with a minimal root use set up loadbalancing instances are stopped and started. As the previous section described, with an instance in a failover group, there is a requirement to start the failover element as a privileged user. It is still possible either through the admin console or via the command line to start an instance non privileged, however a warning will be generated in the console messages to remind the administrator to explicitly start the nodes associated keepalived configuration as a privileged user only if started through the admin console. Until this is done the vip is not operational.
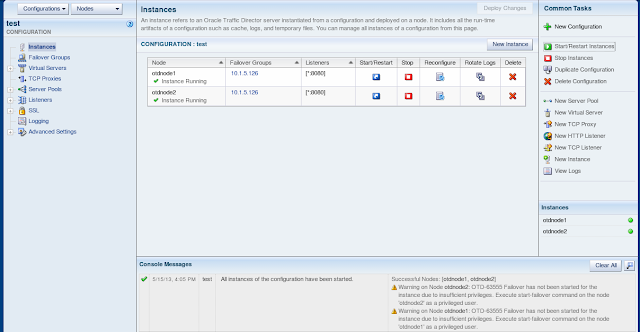
It is important to note that if starting via the CLI the instance will start but no warning about explicitly starting the failover group will be given and this means that an administrator could think the HA vip was working when it will not be. In any scripted startup it is important to ensure after starting the instance the start-failover command is issued locally to each of the instances in the group.
Stopping an instance is also a two stage process, as an instance attempted to be stopped via a non privileged user either through the admin console or the CLI will fail until the associated failover group on the node on which it is running is stopped. This can be shown by the following examples.
From the admin console attempting to stop instances before stopping the failover group.


From the CLI attempting to stop an instance.

$ /u01/OTDInstances/OTDNode1/net-test/bin/stopserv
[ERROR:32] server is not stopped because failover is running. Before stopping the server, execute stop-failover command as a privileged user
For either approach, prior to stopping the instance, there is a need to run the stop of the failover group locally as a privileged user as seen below.

$ sudo /u01/OTD/bin/tadm stop-failover --instance-home=/u01/OTDInstances/OTDNode1 --config=test
It is worth pointing out however that the number of times an instance needs to be stopped and restarted is minimal due to the way most of the configuration changes made are dynamically applied to an instance. By utilising the administration console or including in CLI based configuration changes the ‘reconfig-instance’ command stops and starts can be minimised. 
 

Changing the primary failover instance

The situation may arise where there is a need to ‘flip’ the current owner of the OTD HA vip to the backup node. One such occasion being a possible maintenance window and ordinarily this would be achieved by issuing the ‘Toggle Primary’ button in the admin console or the tadm set-failover-group-primary command. These are still applicable and can be initiated by a non privileged user however there is an additional step that needs to be performed from the CLI locally on the admin nodes.
If you use the admin console to toggle the primary you will see a warning generated however the console will acknowledge the new primary group member.

Testing to see if the backup is now primary by accessing it will show that the existing primary is still the primary, despite the console saying otherwise.
Similarly if the switch is made using the CLI the following warning is given but after the warning the administration ‘thinks’ the switch has been made.

$ /u01/OTD/bin/tadm set-failover-group-primary --config=test --virtual-ip=10.1.5.126 --primary-node=otdnode2 --user=admin --host=OTDAdminServer
Enter admin-user-password>
OTD-63008 The operation was successful on nodes [otdnode1, otdnode2].
Warning on node 'otdnode2':
OTD-67335 Could not restart failover due to insufficient privileges. Execute the start-failover command on node 'otdnode2' as a privileged user.
Warning on node 'otdnode1':
OTD-67335 Could not restart failover due to insufficient privileges. Execute the start-failover command on node 'otdnode1' as a privileged user.
$ /u01/OTD/bin/tadm list-failover-groups --config=test --user=admin --port=8989 --host=OTDAdminServer --all Enter admin-user-password>
10.1.5.126 otdnode2 otdnode1

In order to actually make the toggle active the failover group needs to be restarted and this will force a re-read of the keepalived.conf which will ensure the vip is plumbed up on the new primary host. This command needs to be executed as the privileged user on both instances. It is therefore paramount to ensure that if there is a need to toggle the primary vip host that this two stage process is carried out.

[oracle@OTDNode2 ~]$ sudo /u01/OTD/bin/tadm stop-failover --instance-home=/u01/OTDInstances/OTDNode2 --config=test
[sudo] password for oracle:
OTD-70201 Failover has been stopped successfully.
[oracle@OTDNode2 ~]$ sudo /u01/OTD/bin/tadm start-failover --instance-home=/u01/OTDInstances/OTDNode2 --config=test
OTD-70198 Failover has been started successfully.

Deleting a failover group

Deleting a failover group is also now with minimal root usage, a two stage process that needs to be understood. If you decide to delete a failover group from the admin console or the CLI and the instances in the failover group are running then although the console and the CLI will allow a non privileged user to delete the group, a warning will be generated to alert that the failover group has not been stopped. The keepalived.conf will be removed; however the vip will still be active. It will only be destroyed once the stop-failover command has been executed locally by the privileged user on all instances of the failover group. It is important to realise this and perform the 2 operations close together to ensure that when removing a failover group the vip associated is stopped as well.
Here is an example of the warning in the admin console.

Known Issues

There is a known issue currently outstanding with Oracle Traffic Director that will cause issues if after initial configuration, the administration server is stopped and restarted and the node names chosen to be used in the deployment contain any upper case letters. The issue manifests itself in the admin console where messages like the following are seen Error in parsing configuration TechDemoMWConfig. OTD-63763 Configuration 'test' has not been deployed to node 'OTDNode1'’. After this any attempts to subsequently modify the configuration will fail. This is a bug resolved in a later release and so to workaround this for now there are 2 choices.
Use only lowercase node names for the configuration
Log in as the non privileged user to the administration server vServer and edit the ../config-store/server-farm.xml’ for the administration server node and convert the node names to all lowercase – eg otdnode1. Save the file and then restart the administration server.

Setting up manually simple init.d scripts for vServer start/stop

Because none of the nodes has been configured or executed as root, the new feature available in 11.1.1.7.0 to automatically create init.d startup/shutdown services is not available. Therefore in order to have both nodes and instances start and stop cleanly when a vServer is shutdown or started, manually created and configured /etc/init.d scripts need to be put in place. This clearly requires the use of the root account but is a one off exercise to set up. Here we show an example that can be used to give at least a rudimentary start/stop script for your OTD minimal root privilege environment. These scripts are far less rich in terms of functionality than those provided by the product.
For the administration server node only one init.d script is required to be created and in this example this is called otd-admin-server. An example can be seen here that can be tailored to suit a specific environment:

#!/bin/sh
#
# Startup script for the Oracle Traffic Director 11.1.1.7
# chkconfig: 2345 85 15
# description: Oracle Traffic Director is a fast, \
# reliable, scalable, and secure solution for \
# load balancing HTTP/S traffic to servers in \
# the back end.
# processname: trafficd
#
ORACLE_HOME="/u01/OTD"
OTD_USER=oracle
INSTANCE_HOME="/u01/OTDInstances/AdminServer"
INSTANCE_NAME="admin-server"
PRODUCT_NAME="Oracle Traffic Director"
OTD_TADM_SCRIPT=/tmp/otd_script
case "$1" in
start)
COMMAND="$INSTANCE_HOME/admin-server/bin/startserv"
su - $OTD_USER -c $COMMAND
echo "$ORACLE_HOME/bin/tadm start-snmp-subagent --instance-home $INSTANCE_HOME" > ${OTD_TADM_SCRIPT}
chmod 755 ${OTD_TADM_SCRIPT}
su - $OTD_USER -c ${OTD_TADM_SCRIPT}
rm -f ${OTD_TADM_SCRIPT}
;;
stop)
echo "$ORACLE_HOME/bin/tadm stop-snmp-subagent --instance-home $INSTANCE_HOME" > ${OTD_TADM_SCRIPT}
chmod 755 ${OTD_TADM_SCRIPT}
su - $OTD_USER -c ${OTD_TADM_SCRIPT}
rm -f ${OTD_TADM_SCRIPT}
COMMAND="$INSTANCE_HOME/admin-server/bin/stopserv"
su - $OTD_USER -c $COMMAND
;;
status)
ps -ef | grep $INSTANCE_NAME
;;
*)
echo $"Usage: $0 {start|stop|status}"
exit 1

esac
Once saved and made executable with a chmod +x.
Issuing the following as root within the /etc/init.d directory will configure the script to be started and stopped appropriately as the vServer is.

# chkconfig otd-admin-server on

On each of the admin nodes, 2 scripts need to be created so as to be able to stop the highly available instance and failover group independently of the admin node.
For the admin nodes create a script in the /etc/init.d directory called otd-admin-server and tailor the example below to reflect your environment:

#!/bin/sh
#
# Startup script for the Oracle Traffic Director 11.1.1.7
# chkconfig: 2345 85 15
# description: Oracle Traffic Director is a fast, \
# reliable, scalable, and secure solution for \
# load balancing HTTP/S traffic to servers in \
# the back end.
# processname: trafficd
#
ORACLE_HOME="/u01/OTD"
OTD_USER=oracle
INSTANCE_HOME="/u01/OTDInstances/OTDNode1"
INSTANCE_NAME="admin-server"
PRODUCT_NAME="Oracle Traffic Director"
OTD_TADM_SCRIPT=/tmp/otd_script
case "$1" in
start)
COMMAND="$INSTANCE_HOME/admin-server/bin/startserv"
su - $OTD_USER -c $COMMAND
echo "$ORACLE_HOME/bin/tadm start-snmp-subagent --instance-home $INSTANCE_HOME" > ${OTD_TADM_SCRIPT}
chmod 755 ${OTD_TADM_SCRIPT}
su - $OTD_USER -c ${OTD_TADM_SCRIPT}
rm -f ${OTD_TADM_SCRIPT}
;;
stop)
echo "$ORACLE_HOME/bin/tadm stop-snmp-subagent --instance-home $INSTANCE_HOME" > ${OTD_TADM_SCRIPT}
chmod 755 ${OTD_TADM_SCRIPT}
su - $OTD_USER -c ${OTD_TADM_SCRIPT}
rm -f ${OTD_TADM_SCRIPT}
COMMAND="$INSTANCE_HOME/admin-server/bin/stopserv"
su - $OTD_USER -c $COMMAND
;;
status)
ps -ef | grep admin-server
;;
*)
echo $"Usage: $0 {start|stop|status}"
exit 1

esac
 
Now create a second script on each of the admin nodes this time called otd-net-test for the highly available instance and again this example can be tailored to suit your environment. The name being based is the configuration the instance is hosting:

#!/bin/sh
#
# Startup script for the Oracle Traffic Director 11.1.1.7
# chkconfig: 2345 85 15
# description: Oracle Traffic Director is a fast, \
# reliable, scalable, and secure solution for \
# load balancing HTTP/S traffic to servers in \
# the back end.
# processname: trafficd
#

ORACLE_HOME="/u01/OTD"
OTD_USER=oracle
INSTANCE_HOME="/u01/OTDInstances/OTDNode1"
INSTANCE_NAME="net- TechDemoMWConfig"
PRODUCT_NAME="Oracle Traffic Director"
OTD_TADM_SCRIPT=/tmp/otd_script

case "$1" in
start)
    COMMAND="$INSTANCE_HOME/$INSTANCE_NAME/bin/startserv"
    su - $OTD_USER -c $COMMAND
    echo "$ORACLE_HOME/bin/tadm start-failover --instance-home $INSTANCE_HOME --config=TechDemoMWConfig" > ${OTD_TADM_SCRIPT}
    chmod 755 ${OTD_TADM_SCRIPT}
    $OTD_TADM_SCRIPT
    rm -f ${OTD_TADM_SCRIPT}
    ;;
stop)
    echo "$ORACLE_HOME/bin/tadm stop-failover --instance-home $INSTANCE_HOME --config=TechDemoMWConfig" > ${OTD_TADM_SCRIPT}
    chmod 755 ${OTD_TADM_SCRIPT}
    $OTD_TADM_SCRIPT
    rm -f ${OTD_TADM_SCRIPT}
    COMMAND="$INSTANCE_HOME/$INSTANCE_NAME/bin/stopserv"
    su -$OTD_USER -c $COMMAND
    ;;
status)
    ps -ef | grep $INSTANCE_NAME
    ;;
*)
    echo $"Usage: $0 {start|stop|status}"
    exit 1
esac
 
 
Note these scripts not only stop and start the instance and admin nodes, the instance one also ensures that the failover group is started as the root privileged user. It is also worth pointing out that there is an additional command to start and stop the SNMP sub-agent, this is optional and only required if it is the intention to have, at a later date your OTD estate to be monitored via an Enterprise Manager 12C agent.
Once the 2 scripts are complete, as root, the chkconfig <script_name> on command can be executed to enable them.
The new services can be tested by running the following as the root user on each of the vServers in turn to see that the OTD estate stops and then restarts.


service otd-net-test stop
service otd-admin-server stop
service otd-admin-server start
service otd-net-test start
When complete it will be possible to stop any one of the vServers and maintain a load balancing capability and when restarted the OTD components on the vServer will automatically restart on startup.
Utilising this note you will now have a highly available Oracle Traffic Directory configuration that is only using the root privilege where it is strictly required to do so.

Tuesday, 14 May 2013

Creating Solaris(11.1) zones on the Exalogic Shared Storage

Introduction

Until recently running solaris zones using the older Exalogic release (Solaris 11 Express) was quite possible but there was a significant limitation.  Namely for a supported configuration the zone had to be located on the local SSD drive of the Exalogic compute node.  Because of the limited size of these disks there was effectively a limit to the number/sizes of zones that could be created on each compute node.  With the recent release of Exalogic support for Solaris 11 and some further development from the Engineering teams it is now possible to run Solaris Zones on the ZFS appliance making use of the iscsi protocol.

Prerequisites

In order to get this working on an Exalogic you should image the rack to Solaris (Exalogic 2.0.4.0.0) and upgrade the rack to the  latest patch set (April 2013 PSU - My Oracle Support ID=1545364.1) and also apply a specific patch (My Oracle Support ID=16514816) for "Zones on Shared Storage (ZOSS) over ISCSI".  

Creating the LUNs on the ZFS Appliance

The first activity is to create the various iscsi groups and initiators on the ZFS appliance so that the LUNs that will host the zones can be created.  This is a fairly simple process that involves setting up a SAN (Storage Area Network) with iscsi targets and initiators which can be linked to the LUN storage that is made available to the compute nodes.

We will start with some terminology explanations of what the various components we need to setup actually are:-

TermDescription
Logical UnitA term used to describe a component in a storage system. Uniquely numbered, this creates what is referred to as a Logicial Unit Number, or LUN.  The ZFS Appliance may contain many LUNS. These LUNs, when associated with one or more SCSI targets, forms a unique SCSI device, a device that can be accessed by one or more SCSI initiators.
TargetA target is an end-point that provides a service of processing SCSI commands and I/O requests from an initiator.  A target, once configured, consists of zero or more logical units.
Target GroupA set of targets. LUNs are exported over all the targets in one specific target group.
InitiatorAn application or production system end-point that is capable of initiating a SCSI session, sending SCSI commands and I/O requests. Initiators are also identified by unique addressing methods.
Initiator GroupA set of initiators. When an initiator group is associated with a LUN, only initiators from that group may access the LUN.

1. Create iSCSI Targets

To set things up on the ZFS appliance navigate to Configuration-->SAN & select the iSCSI Targets.  then click on the + sign beside the iSCSI Targets title to add a target.  Having added a target it is possible to drag and drop the target to the right of the screen, into an iSCSI Target Group.  Either adding to an existing group or creating a new group.  (To drag and drop you need to hover the mouse over the target then a crossed pair of arrows appears, click on this to pick up the target and drag it over to the groups.)

Setting up iSCSI Targets on the ZFS Storage Appliance BUI

2. Setup iSCSI Initiators

The setup for the iSCSI initiators and groups is similar in nature to the setup of the targets.  i.e. You click on the + symbol for the iSCSI Initiators, fill in the details then drag and drop the initiator over to the initiator group to either create a new group or add it to an existing one.  The only significant complication is that the creation of an iSCSI Initiator involves specifying an Initiator IQN.  This is a unique reference number that relates to a specific host.  (The compute node that will mount a LUN.)  To find this number is is necessary to log onto each compute node in the Exalogic rack and run the iscsiadm list initiator-node command.


# iscsiadm list initiator-node
Initiator node name: iqn.1986-03.com.sun:01:e00000000000.51891a8b
Initiator node alias: el01cn01
        Login Parameters (Default/Configured):
                Header Digest: NONE/-
                Data Digest: NONE/-
                Max Connections: 65535/-
        Authentication Type: NONE
        RADIUS Server: NONE
        RADIUS Access: disabled
        Tunable Parameters (Default/Configured):
                Session Login Response Time: 60/-
                Maximum Connection Retry Time: 180/-
                Login Retry Time Interval: 60/-
        Configured Sessions: 1

So in the example above the Initiator IQN is:-

 iqn.1986-03.com.sun:01:e00000000000.51891a8b

This is reflected in the ZFS BUI as shown for the first compute node in the list on the left.

ZFS Appliance iSCSI Initiators added and included in a group.

3. Create Storage Project and LUNS

The final step on the storage server side of things is to create your project & LUNs.   The process to create the project & shares (LUNS in this case) is similar to the process for creating filesystems for use via NFS, as described in an earlier blog posting.  In this case rather than creating a Filesystem though you create a LUN.

Creating a LUN on the ZFS Storage Appliance
 
The LUN will now be available to be mounted on any of the compute nodes that are part of the Initiator Group.

Creating the Solaris Zone on the Shared Storage

We now have the storage prepared so that it can be mounted on the compute nodes, our intention is to store the zone on the shared storage and setup an additional bonded network on the 10GbE Exalogic client network that the zone will have exclusive access to.

1. Ensure the disk (LUN) is visible to the node and ready for use.

The first step we need to take is to ensure that the LUN that was created on the storage device is available to the compute node and that the disk is formatted ready for usage.  Prior to checking for the disk it may be necessary to run the iscsiadm commands to setup the shared storage as a supplier of LUNs.  This should only need to be run once on each compute node but we have found that when all zones are removed from a  node it is necessary to re-run this discovery-address command to make the LUNS visible.

# iscsiadm add discovery-address <IP of ZFSSA>
# iscsiadm modify discovery -t enable
# devfsadm -c iscsi
# echo | format
Searching for disks...done


AVAILABLE DISK SELECTIONS:
       0. c0t600144F09C96CCA90000518CDEB10005d0 <SUN-ZFS Storage 7320-1.0-64.00GB>
          /scsi_vhci/disk@g600144f09c96cca90000518cdeb10005
       1. c0t600144F09C96CCA90000518CDF100006d0 <SUN-ZFS Storage 7320-1.0-64.00GB>
          /scsi_vhci/disk@g600144f09c96cca90000518cdf100006
       2. c0t600144F09C96CCA90000518CDFB60007d0 <SUN-ZFS Storage 7320-1.0-64.00GB>
          /scsi_vhci/disk@g600144f09c96cca90000518cdfb60007
       3. c0t600144F09C96CCA900005190BFC4000Ad0 <SUN-ZFS Storage 7320-1.0 cyl 8352 alt 2 hd 255 sec 63>
          /scsi_vhci/disk@g600144f09c96cca900005190bfc4000a

       4. c7t0d0 <LSI-MR9261-8i-2.12-28.87GB>
          /pci@0,0/pci8086,340a@3/pci1000,9263@0/sd@0,0
Specify disk (enter its number): Specify disk (enter its number):
Identifying the LUN on the compute node

 The format command can pick out the LUN which is presented to the Compute Node as a local disk.  The value after the line /scsi_vhci/disk@g maps onto the GUID of the LUN that was created.  This identifies that it is the disk c0t600144F09C96CCA900005190BFC4000Ad0 that is to be formatted and labelled.

# format -e c0t600144F09C96CCA900005190BFC4000Ad0
selecting c0t600144F09C96CCA900005190BFC4000Ad0
[disk formatted]

FORMAT MENU:
...
format> fdisk
No fdisk table exists. The default partition for the disk is:

  a 100% "SOLARIS System" partition

Type "y" to accept the default partition,  otherwise type "n" to edit the
partition table. n
SELECT ONE OF THE FOLLOWING:
...
Enter Selection: 1
Select the partition type to create:
   1=SOLARIS2   2=UNIX      3=PCIXOS     4=Other        5=DOS12
   6=DOS16      7=DOSEXT    8=DOSBIG     9=DOS16LBA     A=x86 Boot
   B=Diagnostic C=FAT32     D=FAT32LBA   E=DOSEXTLBA    F=EFI (Protective)
   G=EFI_SYS    0=Exit? f

SELECT ONE...
...
6

format> label
[0] SMI Label
[1] EFI Label
Specify Label type[1]: 1

Ready to label disk, continue? y

format> quit

We can now see that the format command shows the disk as available and now sized as per the LUN size.

# format
Searching for disks...done


AVAILABLE DISK SELECTIONS:
       0. c0t600144F09C96CCA90000518CDEB10005d0 <SUN-ZFS Storage 7320-1.0-64.00GB>
          /scsi_vhci/disk@g600144f09c96cca90000518cdeb10005
       1. c0t600144F09C96CCA90000518CDF100006d0 <SUN-ZFS Storage 7320-1.0-64.00GB>
          /scsi_vhci/disk@g600144f09c96cca90000518cdf100006
       2. c0t600144F09C96CCA90000518CDFB60007d0 <SUN-ZFS Storage 7320-1.0-64.00GB>
          /scsi_vhci/disk@g600144f09c96cca90000518cdfb60007
       3. c0t600144F09C96CCA900005190BFC4000Ad0 <SUN-ZFS Storage 7320-1.0-64.00GB>
          /scsi_vhci/disk@g600144f09c96cca900005190bfc4000a

       4. c7t0d0 <LSI-MR9261-8i-2.12-28.87GB>
          /pci@0,0/pci8086,340a@3/pci1000,9263@0/sd@0,0
Specify disk (enter its number):

2. Setup the Networking for Client access.  (10GbE network.)

The zone that is being setup will be given access to an exclusive IP network, what this means is that we need to create the appropriate VNICs on the global zone and hand control for these VNICs over to the zone to manage.  An earlier blog posting discusses setting up the 10GbE network for Solaris running on an Exalogic and this will build on that knowledge.

All we need to perform on the global zone is the creation of the VNICs, to do this firstly identify the physical links that relate to the Ethernet over Infiniband devices that the switches present to the Infiniband Host Channel Adapter and hence as devices to the OS.  Then using the two links (one for each physical port) to create the VNICs.

# dladm show-phys
LINK              MEDIA                STATE      SPEED  DUPLEX    DEVICE
net6              Infiniband           up         32000  unknown   ibp1
net0              Ethernet             up         1000   full      igb0
net1              Ethernet             unknown    0      unknown   igb1
net3              Ethernet             unknown    0      unknown   igb3
net4              Ethernet             up         10     full      usbecm0
net8              Ethernet             up         10000  full      eoib1
net2              Ethernet             unknown    0      unknown   igb2
net5              Infiniband           up         32000  unknown   ibp0
net9              Ethernet             up         10000  full      eoib0


One on each link in this case net8 and net9 from above

# dladm create-vnic -l net8 -v 1706 vnic2_1706
# dladm create-vnic -l net9 -v 1706 vnic3_1706

3. Create the Zone

We now have the prerequisites necessary to create our zone.  (A fairly simple example.)  Namely, the storage available via iSCSI and the VNICs we will hand in to the zone to use.

# zonecfg -z zone04
Use 'create' to begin configuring a new zone.
zonecfg:zone04 create
create: Using system default template 'SYSdefault'
zonecfg:zone04> set zonepath=/zones/zone04
zonecfg:zone04> add rootzpool
zonecfg:zone04:rootzpool> add storage iscsi://192.168.14.133/luname.naa.600144f09c96cca900005190bfc4000a
zonecfg:zone04:rootzpool> end
zonecfg:zone04> remove anet
zonecfg:zone04> add net
zonecfg:zone04:net> set physical=vnic2_1706
zonecfg:zone04:net> end
zonecfg:zone04> add net
zonecfg:zone04:net> set physical=vnic3_1706
zonecfg:zone04:net> end

zonecfg:zone04> verify
zonecfg:zone04> commit
zonecfg:zone04> info
zonename: zone04
zonepath: /zones/zone04
brand: solaris
autoboot: false
bootargs:
file-mac-profile:
pool:
limitpriv:
scheduling-class:
ip-type: exclusive
hostid:
fs-allowed:
net:
    address not specified
    allowed-address not specified
    configure-allowed-address: true
    physical: vnic2_1706
    defrouter not specified
net:
    address not specified
    allowed-address not specified
    configure-allowed-address: true
    physical: vnic3_1706
    defrouter not specified
rootzpool:
    storage: iscsi://192.168.14.133/luname.naa.600144f09c96cca900005190bfc4000a
zonecfg:zone04>

During this configuration process we use the default zone creation template which includes a network for the net0 link (1GbE management) which we do not need in our zone so we remove this as part of the configuration.  The storage is defined using the URL for the LUN, this includes the LUN GUID prefixed by iscsi://<IP Address of the Shared Storage>/luname.naa.

The next step is to install the zone and boot it up.  Before attempting to do this ensure that you have a valid repository for the Solaris installation setup on the global zone.  The zone creation will use this repository to lay down the OS files for the zone. 


# zoneadm -z zone04 install
Configured zone storage resource(s) from:
    iscsi://192.168.14.133/luname.naa.600144f09c96cca900005190bfc4000a
Created zone zpool: zone04_rpool
Progress being logged to /var/log/zones/zoneadm.20130513T104657Z.zone04.install
       Image: Preparing at /zones/zone04/root.

 AI Manifest: /tmp/manifest.xml.lPaGVo
  SC Profile: /usr/share/auto_install/sc_profiles/enable_sci.xml
    Zonename: zone04
Installation: Starting ...

              Creating IPS image
Startup linked: 1/1 done
              Installing packages from:
                  exa-family
                      origin:  http://localhost:1008/exa-family/acbd22da328c302a86fb9f23d43f5d10f13cf5a6/
                  solaris
                      origin:  http://install1/release/solaris/
DOWNLOAD                                PKGS         FILES    XFER (MB)   SPEED
Completed                            185/185   34345/34345  229.7/229.7 10.6M/s

PHASE                                          ITEMS
Installing new actions                   48269/48269
Updating package state database                 Done
Updating image state                            Done
Creating fast lookup database                   Done
Installation: Succeeded

        Note: Man pages can be obtained by installing pkg:/system/manual

 done.

        Done: Installation completed in 81.509 seconds.


  Next Steps: Boot the zone, then log into the zone console (zlogin -C)

              to complete the configuration process.

Log saved in non-global zone as /zones/zone04/root/var/log/zones/zoneadm.20130513T104657Z.zone04.install


# zoneadm -z zone04 boot

The zone should boot up very quickly then you can zlogin to the zone to setup the networking.  This will involve using the VNICs given to the zone for exclusive control to create interfaces, bond them together using the Solaris ipmp functionality and allocate an IP address.  We found that we also had to setup the routing table to give a default route.

# zlogin zone04
[Connected to zone 'zone04' pts/7]
Oracle Corporation    SunOS 5.11    11.1    December 2012

root@zone04:~# dladm show-vnic
LINK                OVER         SPEED  MACADDRESS        MACADDRTYPE       VID
vnic2_1706          ?            10000  2:8:20:f5:83:fa   random            1706
vnic3_1706          ?            10000  2:8:20:fa:ab:98   random            1706
root@zone04:~# ipadm create-ip vnic2_1706
root@zone04:~# ipadm create-ip vnic3_1706
root@zone04:~# ipadm create-ipmp bond1
root@zone04:~# ipadm add-ipmp -i vnic2_1706 -i vnic3_1706 bond1
root@zone04:~# ipadm set-ifprop -p standby=on -m ip vnic3_1706
root@zone04:~# ipadm show-if
IFNAME     CLASS    STATE    ACTIVE OVER
lo0        loopback ok       yes    --
vnic2_1706 ip       ok       yes    --
vnic3_1706 ip       ok       no     --
bond1      ipmp     down     no     vnic2_1706 vnic3_1706
root@zone04:~# ipadm create-addr -T static -a local=138.3.51.2/22 bond1/v4
root@zone04:~# ipadm show-if
IFNAME     CLASS    STATE    ACTIVE OVER
lo0        loopback ok       yes    --
vnic2_1706 ip       ok       yes    --
vnic3_1706 ip       ok       no     --
bond1      ipmp     ok       yes    vnic2_1706 vnic3_1706
root@zone04:~# ipadm show-addr
ADDROBJ           TYPE     STATE        ADDR
lo0/v4            static   ok           127.0.0.1/8
bond1/v4          static   ok           138.3.51.2/22
lo0/v6            static   ok           ::1/128
root@zone04:~# netstat -rn

Routing Table: IPv4
  Destination           Gateway           Flags  Ref     Use     Interface
-------------------- -------------------- ----- ----- ---------- ---------
127.0.0.1            127.0.0.1            UH        2          0 lo0      
138.3.48.0           138.3.51.2           U         2          0 bond1    

Routing Table: IPv6
  Destination/Mask            Gateway                   Flags Ref   Use    If  
--------------------------- --------------------------- ----- --- ------- -----
::1                         ::1                         UH      2       0 lo0  
root@zone04:~# route -p add default 138.3.48.1
add net default: gateway 138.3.48.1
add persistent net default: gateway 138.3.48.1
root@zone04:~# netstat -rn

Routing Table: IPv4
  Destination           Gateway           Flags  Ref     Use     Interface
-------------------- -------------------- ----- ----- ---------- ---------
default              138.3.48.1           UG        1          0          
127.0.0.1            127.0.0.1            UH        2          0 lo0      
138.3.48.0           138.3.51.2           U         2          0 bond1    

Routing Table: IPv6
  Destination/Mask            Gateway                   Flags Ref   Use    If  
--------------------------- --------------------------- ----- --- ------- -----
::1                         ::1                         UH      2       0 lo0  
root@zone04:~#

Migrating the Zone from one host to another.

As a final activity we tried going through the process to see how simple it is to move the zone from one physical host to another.  This approach seems to work smoothly and allowed the zone to be moved in a matter of minutes although it did have to be shutdown during the process. (ie. If you are needing 100% service availability then make sure you use a clustered software solution that will enable continuous availability.)

Firstly on the compute node that originally hosts the zone shutdown & detatch the zone then export the configuration.  We exported it to a filesystem on the ZFS storage that was mounted on both the original and target hosts (/u01/common/general)   Alternatively the export could be simply scp'd between the nodes.)


# zoneadm -z zone04 shutdown
# zoneadm -z zone04 detach
zoneadm: zone 'zone04': warning(s) occured during processing URI: 'iscsi://192.168.14.133/luname.naa.600144f09c96cca900005190bfc4000a'
Could not remove one or more iSCSI discovery addresses because logical unit is in use
Exported zone zpool: zone04_rpool
Unconfigured zone storage resource(s) from:
        iscsi://192.168.14.133/luname.naa.600144f09c96cca900005190bfc4000a


# mkdir -p /u01/common/general/zone04
# zonecfg -z zone04 export > /common/general/zone04/zone04.cfg

Then on the new zone host we import the zone from the export created on the original host, attach the zone and boot it up.

# zonecfg -z zone04 -f /common/general/zone04/zone04.cfg
# zoneadm -z zone04 attach
Configured zone storage resource(s) from:
    iscsi://192.168.14.133/luname.naa.600144f09c96cca900005190bfc4000a
Imported zone zpool: zone04_rpool
Progress being logged to /var/log/zones/zoneadm.20130513T135704Z.zone04.attach
    Installing: Using existing zone boot environment
      Zone BE root dataset: zone04_rpool/rpool/ROOT/solaris
                     Cache: Using /var/pkg/publisher.
  Updating non-global zone: Linking to image /.
Processing linked: 1/1 done
  Updating non-global zone: Auditing packages.
No updates necessary for this image.

  Updating non-global zone: Zone updated.
                    Result: Attach Succeeded.
Log saved in non-global zone as /zones/zone04/root/var/log/zones/zoneadm.20130513T135704Z.zone04.attach

# zoneadm -z zone04 boot

The only issue that we identified was that the process of detaching and attaching cause the server to boot up with the system configuration wizard running.   (Logon to the console to complete the wizard - # zlogin -C zone04 This needs to be completed to allow the zone to boot fully.

Friday, 10 May 2013

10GbE connections with Exalogic running Solaris 11.1

All the networking has been significantly changed from Solaris 10 to Solaris 11, full details of just how to configure Solaris 11 networking can be found in the documentation.  However this is a short "how to" posting about how to setup a 10GbE client connection on a Exalogic rack running Solaris.

Infiniband Switch Configuration

Firstly there are some changes needed to the Infiniband switch.  Namely it is necessary to run the command allowhostconfig this is because with Solaris 11 some of the VNIC configuration and setting up of VLANs is done on the compute node and pushed out to the infiniband switches.  Running allowhostconfig means that the switch is set to enable this.  Then create a VLAN with ID -1 on each of the connectors to the 10GbE network.  Repeat the process to create the VLAN you want to use.  In our example this is VLAN 1706.  Finally create the VNICs on the IB switch as described in the Exalogic documentation, ensure that the VNICs created are for the VLAN 0.

#
# allowhostconfig
# createvlan 1A-ETH-1 -vlan -1 -pkey ffff
# showvlan
  Connector/LAG  VLN   PKEY
  -------------  ---   ----
  1A-ETH-1        0    ffff
  1A-ETH-1        1706 ffff
# createvnic ......
#

Go through the process for identifying the GUIDs etc. on the host and defining a MAC address to create the vnic.  (Use ibstat on the host to identify the Infiniband GUID.)

Once all the VNICs for each compute node are created on the switch it will look something like this:-


# showvnics
ID  STATE     FLG IOA_GUID                NODE                             IID  MAC               VLN PKEY   GW
--- --------  --- ----------------------- -------------------------------- ---- ----------------- --- ----   --------
  1 WAIT-IOA    N 0021280001A18A10         EL-C  192.168.14.125            0000 A0:8A:10:50:00:25 NO  ffff   1A-ETH-1
  7 WAIT-IOA    N 0021280001CED42F         EL-C  192.168.14.123            0000 A0:D4:2F:50:00:23 NO  ffff   1A-ETH-1
 10 WAIT-IOA    N 0021280001CEC533         EL-C  192.168.14.119            0000 A0:C5:33:50:00:19 NO  ffff   1A-ETH-1
  0 WAIT-IOA    N 0021280001CEC644         EL-C  192.168.14.124            0000 A0:C6:44:50:00:24 NO  ffff   1A-ETH-1
  2 WAIT-IOA    N 0021280001CED348         EL-C  192.168.14.128            0000 A0:D3:48:50:00:28 NO  ffff   1A-ETH-1

  3 WAIT-IOA    N 0021280001CED44C         EL-C  192.168.14.127            0000 A0:D4:4C:50:00:27 NO  ffff   1A-ETH-1

 11 WAIT-IOA    N 0021280001CED45B         EL-C  192.168.14.120            0000 A0:D4:5B:50:00:20 NO  ffff   1A-ETH-1
  6 WAIT-IOA    N 0021280001CED368         EL-C  192.168.14.126            0000 A0:D3:68:50:00:26 NO  ffff   1A-ETH-1
  9 WAIT-IOA    N 0021280001CED373         EL-C  192.168.14.122            0000 A0:D3:73:50:00:22 NO  ffff   1A-ETH-1
  5 UP          N 0021280001CED37C         EL-C  192.168.14.129            0040 A0:D3:7C:50:00:29 NO  ffff   1A-ETH-1
  4 UP          N 0021280001CED384         EL-C  192.168.14.130            0040 A0:D3:84:50:00:30 NO  ffff   1A-ETH-1
 12 WAIT-IOA    N 0021280001CEC99B         EL-C  192.168.14.117            0000 A0:C9:9B:50:00:17 NO  ffff   1A-ETH-1
  8 WAIT-IOA    N 0021280001CEC6A7         EL-C  192.168.14.121            0000 A0:C6:A7:50:00:21 NO  ffff   1A-ETH-1
 13 WAIT-IOA    N 0021280001CED3EF         EL-C  192.168.14.118            0000 A0:D3:EF:50:00:18 NO  ffff   1A-ETH-1

ie. Expect to see them in a WAIT-IOA mode, they will not change to UP until the corresponding create-ip is run against the links on the solaris hosts.

Exalogic Solaris Host Configuration


The Exalogic I used to discover this information was setup for manual network configuration which is how I would expect it to always be but you can check the setup using the netadm list command.  Assuming manual configuration the first step is to remove any of the hostname files in /etc that relate to the bond number you wish to create.  (The bond1 hostname files were created during the running of the ECU for the 2.0.4.0.0 Exalogic release.)  Then reboot the node.


# rm /etc/hostname.bond1
# rm /etc/hostname.eoib0
# rm /etc/hostname.eoib1
# reboot

Now we need to use the dladm and ipadm commands which allow manipulation of the Solaris networking.
dladm - Data Link administration, ipadm - IP administration.

Firstly identify the data links that relate to the VNICs you created on the Infiniband switch, this is done with the dladm show-phys command.  These are the links that are on the devices identified by eoibn.  In the output below they map to the links net8 and net9.  (On most of the nodes these were net7 & net8)  You can also use the -m option to display the MAC addresses, these will correspond with the MAC addresses used on each Infiniband switch for that VNIC.


# dladm show-phys
LINK              MEDIA                STATE      SPEED  DUPLEX    DEVICE
net6              Infiniband           up         32000  unknown   ibp1
net0              Ethernet             up         1000   full      igb0
net1              Ethernet             unknown    0      unknown   igb1
net3              Ethernet             unknown    0      unknown   igb3
net4              Ethernet             up         10     full      usbecm0
net8              Ethernet             up         10000  full      eoib1
net2              Ethernet             unknown    0      unknown   igb2
net5              Infiniband           up         32000  unknown   ibp0
net9              Ethernet             up         10000  full      eoib0
root@el2bcn01:~# dladm show-phys -m
LINK                SLOT     ADDRESS            INUSE CLIENT
net6                primary  unknown            no   --
net0                primary  0:21:28:d7:e9:44   yes  net0
net1                primary  0:21:28:d7:e9:45   no   --
net3                primary  0:21:28:d7:e9:47   no   --
net4                primary  2:21:28:57:47:17   yes  usbecm0
net8                primary  a0:c5:80:50:0:1    no   --
net2                primary  0:21:28:d7:e9:46   no   --
net5                primary  unknown            no   --
net9                primary  a0:c5:7f:50:0:1    no   --

Now use IP admin to create the IP interfaces for the two links you have identified and the ipmp group.  The link name maps to the names you identified from the dladm show-phys command.

# ipadm create-ipmp bond1
# ipadm create-ip net8
# ipadm create-ip net9

Now create the VNICs and in our case they are to use a tagged VLAN, mapping onto the links identified earlier.  The create VNIC command links together the physical link, a VLAN and gives the interface a name.   The dladm show-vnic command displays what VNICS have been created.

Now create the two interfaces for thes VNICS using the ipadm create-ip command again and then set the properties of one of the interfaces to make it standby  for the bonded interface.  (In Solaris speak ipmp ~= linux bond.)  Then add the two interfaces to the ipmp bond we created earlier.

# dladm create-vnic -l net8 -v 1706 eoib0_1706
# dladm create-vnic -l net9 -v 1706 eoib1_1706
# dladm show-vnic
LINK                OVER         SPEED  MACADDRESS        MACADDRTYPE       VID
eoib1_1706          net8         10000  2:8:20:3:df:5f    random            1706
eoib0_1706          net9         10000  2:8:20:c9:8b:b2   random            1706
# ipadm create-ip eoib0_1706

# ipadm create-ip eoib1_1706
# ipadm set-ifprop -p standby=on -m ip eoib1_1706
# ipadm add-ipmp -i eoib0_1706 -i eoib1_1706 bond1

Then give the bonded interface an IP address.


# ipadm create-addr –T static –a local=10.100.44.68/22 bond1/v4
# ipadm show-if
IFNAME     CLASS    STATE    ACTIVE OVER
lo0        loopback ok       yes    --
net0       ip       ok       yes    --
net4       ip       ok       yes    --
net8       ip       down     no     --
net9       ip       down     no     --
bond0_0    ip       ok       yes    --
bond0_1    ip       ok       no     --
bond0      ipmp     ok       yes    bond0_0 bond0_1
bond1      ipmp     ok       yes    eoib1_1706 eoib0_1706
eoib1_1706 ip       ok       no     --
eoib0_1706 ip       ok       yes    --


# ipadm show-addr
ADDROBJ           TYPE     STATE        ADDR
lo0/v4            static   ok           127.0.0.1/8
net0/v4           static   ok           138.3.2.87/21
net4/v4           static   ok           169.254.182.77/24
bond0/v4          static   ok           192.168.14.101/24
bond1/v4          static   ok           138.3.48.35/22
bond1/v4a         static   ok           138.3.51.1/22
lo0/v6            static   ok           ::1/128
net0/v6           addrconf ok           fe80::221:28ff:fed7:e944/10

Now your Solaris 10GbE network connection using a tagged VLAN should be up and running.  Looking at the VNICs on the Infiniband switch we can see that an additional VNIC now appears, the MAC address matching onto the MAC address of the underlying interface of bond1.  You can further check the Infiniband IOA_GUID against the host channel adapter in Solaris by either using the dladm show-ib command or ibstat to output the GUIDs.

# showvnics | grep -e STATE -e ----- -e 101
ID  STATE     FLG IOA_GUID                NODE                             IID  MAC               VLN PKEY   GW
--- --------  --- ----------------------- -------------------------------- ---- ----------------- --- ----   --------
 18 UP          N 0021280001CEC57F         EL-C  192.168.14.101            0000 A0:C5:7F:50:00:01 NO  ffff   1A-ETH-1
 35 UP          H 0021280001CEC57F         EL-C  192.168.14.101            8001 02:08:20:C9:8B:B2 1706 ffff   1A-ETH-1


& on the compute node

# ifconfig eoib0_1706
eoib0_1706: flags=201000843<UP,BROADCAST,RUNNING,MULTICAST,IPv4,CoS> mtu 1500 index 12
        inet 0.0.0.0 netmask ff000000
        groupname bond1
        ether 2:8:20:c9:8b:b2
root@el2bcn01:~# ifconfig eoib1_1706
eoib1_1706: flags=261000843<UP,BROADCAST,RUNNING,MULTICAST,IPv4,STANDBY,INACTIVE,CoS> mtu 1500 index 11
        inet 0.0.0.0 netmask ff000000
        groupname bond1
        ether 2:8:20:3:df:5f


Note - Under Solaris 11 the VNICs we create are dynamic and appear on the infiniband switches when the host OS starts up the VNIC.  Because we configure things with an ipmp group the VNIC is only reported on the actively used switch.  Unlike a physical linux environment these do not appear in the /conf/bx.conf file on the switch.

So in summary the commands to use on the Solaris 11.1 compute node are:-

# ipadm create-ipmp <BOND NAME>
# ipadm create-ip <link name of eoib0>
# ipadm create-ip <link name of eoib1>
# dladm create-vnic -l
<link name of eoib0> -v <VLAN ID> <IF 1 NAME>
# dladm create-vnic -l
<link name of eoib1> -v <VLAN ID> <IF 2 NAME>
# ipadm create-ip <IF 1 NAME>
# ipadm create-ip <IF 2 NAME>
# ipadm set-ifprop -p standby=on -m ip <IF 2 NAME>
# ipadm add-ipmp -i <IF 1 NAME> -i <IF 2 NAME> <BOND NAME>
# ipadm create-addr –T static –a local=<IPv4 ADDRESS>/<Netmask in CIDR format> <BOND NAME>/v4
 

Many thanks to Steve Hall for working all this out!